Inexpensive DIY Easter Decorating Ideas
Some of you may be “into” Easter decorating and some not. If you are, then this article is for you. If you are not but you are curious, then this article is for you too.

Ukranian Pysanky Egg - Source FolkArtUAG (Etsy)
Do you love to decorate for the yearly holidays? With Easter coming up soon, we have found some inexpensive and fun ways to bring some Easter cheer to your home. Particularly if you have kids or grandkids.
Easter, and in particular eggs, are associated with new growth, fertility, rebirth, and with spring. Flowers will be popping up, tender green buds will start to appear and all of a sudden the long dark days of winter are behind us and forgotten.
The decorating of eggshells is a very old tradition that can be found in early Africa where 60,000 year old decorated and engraved ostrich eggs were discovered. 5,000 years ago the ancient Sumerians and Egyptians decorated eggs in gold and silver. These eggs were travel companions for the dead and therefore placed in tombs and graves.
From these cultures, the tradition spread around the Mediterranean and into Mesopotamia where It was adopted by Judaic, Christian, and Islamic populations. Decorated eggs became symbols of fertility and rebirth.
It was not until the Middle Ages that the tradition became associated with Easter. And, in particular with eating eggs after fasting, prior to Easter. Since then colouring and decorating Easter eggs have become firmly established in our culture.
The gorgeous egg above is a Ukrainian Pysanka Easter egg, decorated with traditional folk motifs and designs. A pysanka egg is ‘painted’ using a wax-resist method whereby the motifs are applied with beeswax.

A collection of painted and decorated chicken eggs with a sprinkle of chocolate ones. Purple Pig Interiors
Often the colours associated with Easter decorations are soft pastels, or happy, bright yellows, blues, and oranges.
We have roamed the internet to find some really pretty and cute decorations.
Wreaths
Nothing is more welcoming than a beautiful wreath on your front door. Invite guests into your home by bringing a smile to their faces. Here are some DIY ideas for easy, inexpensive wreaths.
Chick Wreath
Cut a cardboard square of approximately 16” x 16” (40 x 40 cm) into a ring of 2” wide. Add about 50 fluffy chickies with a can of fast tack. Add a ribbon loop at the top and hang it on your front door. Cute and friendly, especially when you have kids.
Bunny Wreath
Purchase a lush green wreath. With a hot glue gun fasten a stuffed bunny to the bottom centre. Add two ribbon bows in an earthy colour to the bottom and your wreath is ready to meet your visitors.


Umbrella wreath
How dang sweet is this idea! Don’t you wish you‘d have thought of it yourself…? An old umbrella, some faux or natural bunches of tulips (about 4-5 bunches), held in place with a ribbon. Nothing to it but so fresh and interesting. This one we are going to do ourselves. Too lovely not to make this! It can even last the entire summer!
Displays
Decorate your mantle, your dining room buffet or your entry table with some of the following - easy to make - pieces.
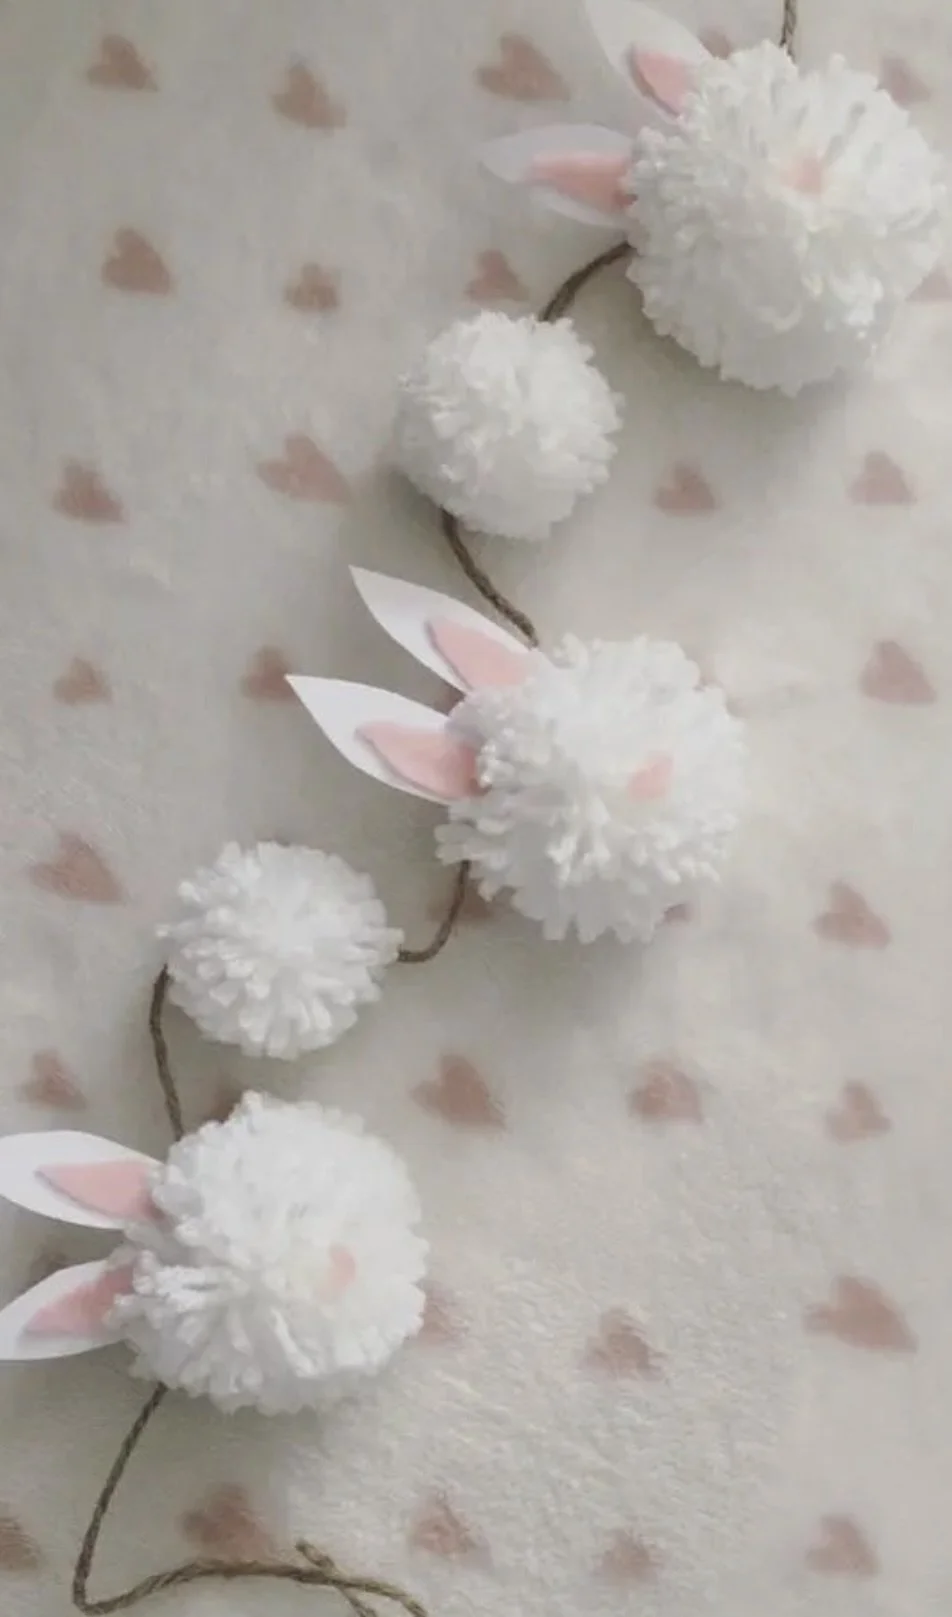

Bunny Pompoms on a String
A fun garland for your kids' rooms, the mantle, or draped over a mirror. Pompoms are easy to make. There are plenty of tutorials on YouTube. Cut the ears from white and pink felt and glue them to the back of the pompom with a glue gun. A tiny pink felt heart forms the bunny's mouth. Glue the bunnies' heads and small pompoms to a string. Loop the ends of the string and hang them over your kids' beds or in front of a window.
Bunny Ears
These bunny ears are made from a single length of paper, folded and tied together in the centre with a colourful string. Some faux, tiny flowers and greenery, available at your local craft store, are then added to the bottom section. Great for nameplates on the dinner table.

Pinterest & Purple Pig Interiors
DIY Carrots
Cut and fold paper or fabric strips to make multiple carrots. Glue the long sides together with a hot glue gun if you are using fabric strips. Use rubber cement to glue paper strips together. Insert cut, green felt or paper strips to create the look of some greenery. Use the above pattern as a guide. Arrange the carrots in a bowl and display them.
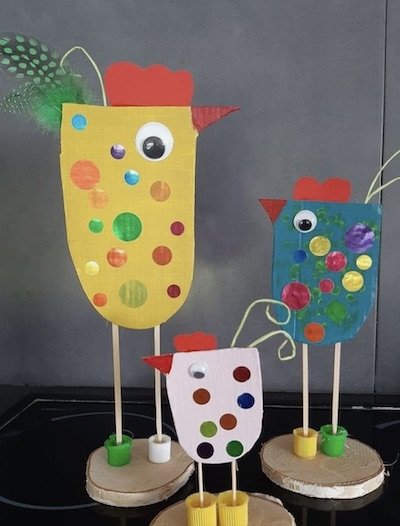
Chicks
Using colourful hobby paper, toothpicks, feathers, slices of wood, glitter, and stickers, prepare three different sizes of chicks as per the image. Cut the bodies two times. Glue the tails, combs, beaks, and toothpicks to the wrong side of one body part. Then glue the wrong side of the body to the other wrong side of the body. Stick the toothpicks into small corks. Wrap the corks in paper and glue the stick figures to the wood base. A bit more work, but fun to do with your kids.
Pots, Vases & Dinner Table Decorations
Cheer up a table, desktop, or hall table with one of these simple to make display items.
1. Arrange some bare branches from your garden in a piece of pottery and decorate with DIY paper or felt eggs with a pompom yoke. Use a white ribbon to hang them.
2. Or, instead of DIY eggs, purchase some plastic eggs in pastel colours to hang from white-sprayed, bare branches. Cut some paper birds from soft coloured paper (wrapping, or hobby paper). Glue a stick to the backs and place them in a bucket with the branches. If you double the bird bodies and glue them together, you can add the sticks within so they are not visible.


3. Spray paint a mason jar in a fresh green colour, add some live green branches. and display plastic eggs with your own painted motifs.
4. Showcase a bunch of carrots in a vase with some white flowers, some baby’s breath, and additional greenery. Could it be any simpler…?!
5. Add a centrepiece in the form of a runner with multiple, small balloons in pastel colours. To add more interest paint some decorations on the balloons. You can add stars, lines, polka dots, etc. Place the balloons on green crinkle paper to form a base. Lastly, add some chocolate eggs.


6. A row of colourful plastic eggs perched on short sticks of various heights makes for a lovely centrepiece as well. The sticks are mounted on a block of wood and the piece is arranged on a long run of faux grass.
7. Sew some bunny pockets for your flatware. Use felt or fleece to create these cute little gems. One large circle for the bottom front and a large circle plus a smaller one for the head complete with two ears to form the back of the pocket. Add a small pompom to the front. Sew the two pieces together and drop in the cutlery. You’re good to go! Your kids will love it!
8. Fold the napkins into bunny ears. Place a hardboiled or chocolate egg in the centre and tie the ends together with a small ribbon.

Purple Pig Interiors
The Hand Painted Easter Egg
Few of us have grown up not knowing about Easter eggs. Most of us know about colouring eggs for Easter, and egg hunts organized by parents and grandparents. Here are some suggestions for more traditional Easter eggs that can be used as decorative elements or distributed for an egg hunt.
The trend this year appears to be eggs with softer colours than the bright blue, pink, red and yellow ones we used to see. These softer tones fit well with the more muted interiors people live in these days. We love the hand painted eggs with a reference to Picasso or Dali. Simple faces on a blush background. Pretty sprigs add more visual interest. In contrast the brown eggs decorated with white flower petals and black hearts are reminiscent of the contemporary Finnish fabric designer Marimekko. And what about a simple, hardboiled egg with a pretty feather attached to it. Feathers you might find outside or purchase at a craft store.


Last But Not Least…
A couple of recipes to satisfy that sugar craving we all have sometimes. Simple cookie forms can be found here. Baking cookies in fun shapes and decorating them with fondant and royal icing is an activity that kids will love. While the cookies shown below are so perfect in form and decor, they really don’t have to be, right…! Perfection is not for all of us.
A simple sugar cookie with chocolate eggs in colourful candied shells can be done in half an hour (Source of recipe and image is A Pretty Life In The Suburbs). Even we can make sugar cookies and we are not bakers!
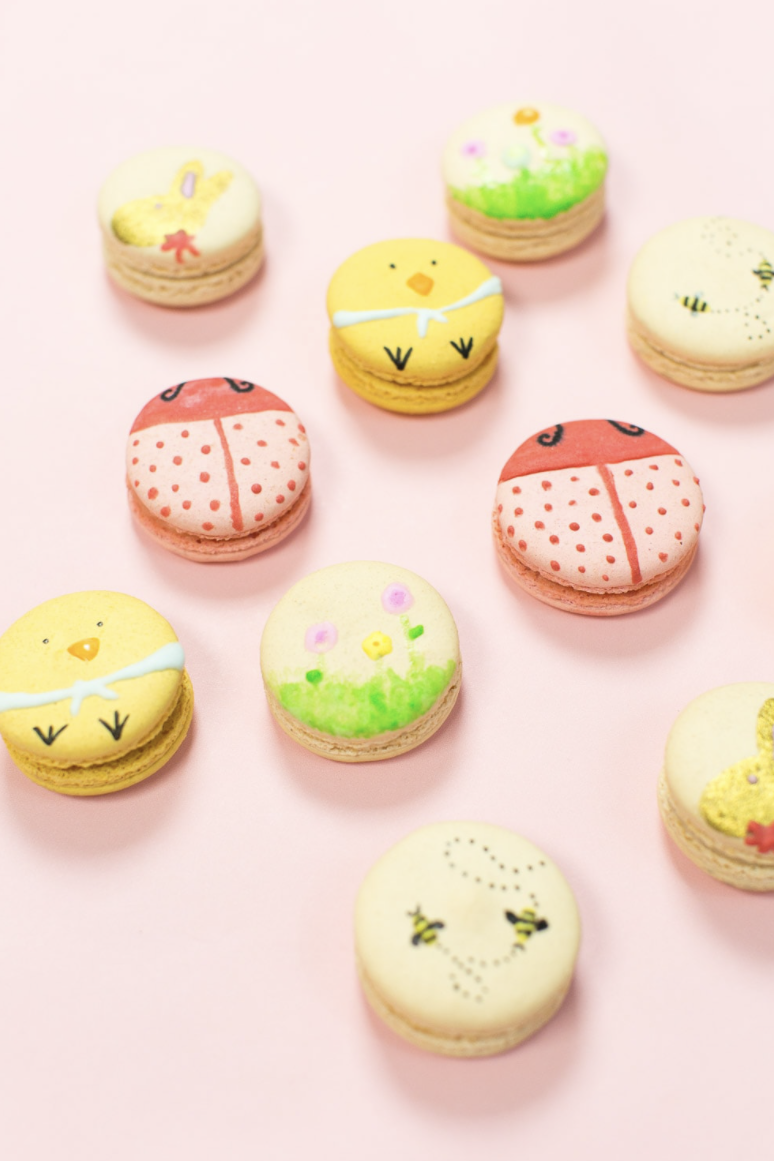
Or, how about purchasing some macaroons and then decorating those with royal icing! We really like this idea. Macaroons have such pretty colours that they will fit in perfectly with a pastel Easter decor.
Kids also will love the Easter cake pops shown below. A bit messy but oh, so satisfying, activity.


You can get the recipe for a simple sugar cookie with candied eggs here. The Easter cake pop recipe is here.
* * * * *
Wishing you a happy Easter should you celebrate it. If not, enjoy the long weekend coming up!
Happy decorating, Jessica & Loretta
NOTE: The source of the images is primarily Pinterest without any indication whom to credit. If we have not properly credited an image, please let us know. We want to give credit where credit is due!